
July 2, 2026


Installing a new bathtub faucet is a beginner-level DIY project most homeowners can finish in 1 to 2 hours — no professional required for most standard spout replacements.
Here’s the basic process at a glance:
That’s the core of it. The sections below walk through each step in detail.
A dripping tub faucet isn’t just annoying — it can waste up to 10,000 gallons of water per year. That’s a real hit to your water bill and a problem that usually has a simple fix. Whether your faucet is leaking, outdated, or just worn out, replacing it yourself can save you $150 to $350 in labor costs compared to hiring a plumber.
The good news? Most tub spout replacements don’t require opening walls, rerouting pipes, or any special skills. If you can use a wrench and follow a few steps, you can handle this.
The trickiest part for most homeowners isn’t the installation itself — it’s knowing which type of spout they have before they start. Getting that wrong means a trip back to the hardware store. This guide solves that before you pick up a single tool.
I’m Upfront, and our team has helped Idaho homeowners with plumbing projects ranging from simple faucet swaps to full pipe replacements — including installing new bathtub faucets across hundreds of homes in the Treasure Valley. We’ve put this guide together so you can tackle the job confidently, and know exactly when it makes sense to call in a pro.

Before you run to your local home improvement store in Boise, Nampa, or Caldwell to buy a shiny new fixture, you need to know what you are working with. Bathtub spouts are not one-size-fits-all. In fact, if you buy the wrong type, you won’t be able to attach it to your existing pipe without calling in a professional to modify your plumbing.
There are two primary types of bathtub spouts: slip-on (also called slip-fit) and threaded (also called screw-on).

Here is a quick breakdown to help you compare the two:
| Feature | Slip-On Spout | Threaded Spout |
|---|---|---|
| How it attaches | Slides over a smooth copper pipe and is held by a set screw | Screws directly onto a threaded pipe nipple |
| Set Screw Presence | Yes (usually hidden on the underside near the wall) | No set screw |
| Pipe Type Required | Smooth, rigid 1/2-inch copper pipe | Threaded iron or brass pipe (or copper with a threaded adapter) |
| Removal Method | Loosen the set screw, then pull straight off | Rotate the entire spout counterclockwise to unscrew |
To identify your spout, grab a flashlight and look at the underside of the spout where it meets the bathroom wall.
If you want a deeper look into how these different configurations affect your bathroom’s layout, check out this How to Replace a Bathtub Faucet: DIY Guide | Badeloft for an outstanding breakdown of wall-mount, deck-mount, and freestanding configurations.
Taking a few minutes to prepare will keep your quick afternoon project from turning into a frantic call to an emergency plumber.
While you can technically replace some tub spouts without shutting off the water to the entire house (since the shower valve handles block the water flow), we strongly advise against it. If someone accidentally turns on the shower handle while the spout is off, you will end up with a high-pressure geyser soaking your bathroom.
Locate your home’s main water shutoff valve. In Idaho homes—whether you are in Meridian, Eagle, or Garden City—this is typically found in the basement, crawlspace, utility closet, or near the water meter. Turn the valve clockwise to shut off the water, then turn on the lowest faucet in your home to drain any remaining water pressure from the lines. For more complex plumbing setups, understanding your home’s General Plumbing system is always a great starting point.
You do not want to be mid-installation only to realize you are missing a key sealant. Gather these tools before you begin:
Pro-tip: Lay an old towel or a drop cloth over your bathtub drain. This protects your tub’s porcelain or acrylic surface from dropped tools and prevents tiny screws from falling down the drain!
While you are upgrading your bathroom fixtures, keep safety in mind. Hot water scalds are a common household injury. The Consumer Product Safety Commission (CPSC) recommends setting your residential water heater temperature at or below 120°F (49°C) to reduce burn risks, especially for households with children or elderly family members. If you are replacing the valve cartridge along with the spout, make sure to adjust the rotational limit stop on the new cartridge to prevent the handle from turning to extreme hot temperatures.
For a comprehensive checklist of tools and initial safety steps, consult the official guide on How to Replace a Bathtub Faucet.
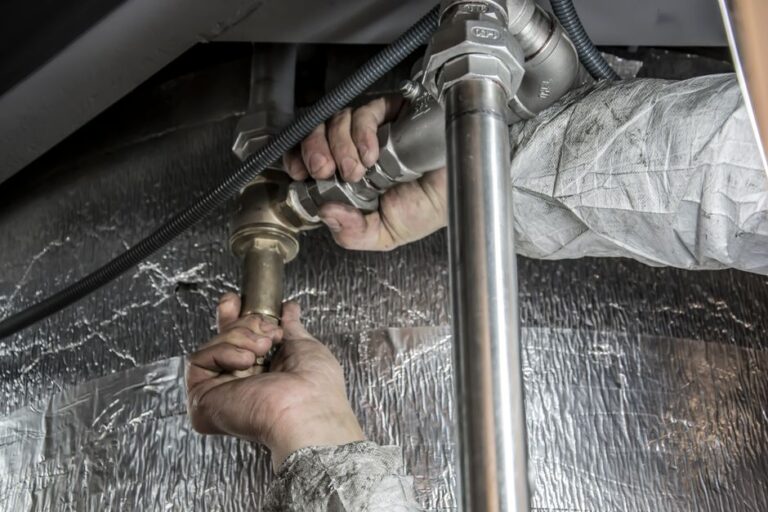
Now that you have identified your spout type, shut off the water, and prepped your workspace, it is time to get your hands dirty.
Once the old spout is off, you will likely see a buildup of old caulk, rust, and mineral deposits on the pipe protruding from the wall. Use a putty knife or utility knife to scrape away the old caulk. Wipe the pipe clean using a microfiber cloth and rubbing alcohol or a mild bathroom cleaner.
Inspect the pipe carefully. If the copper pipe is heavily corroded, green, or pitted, it may need to be replaced or cleaned thoroughly before installing new bathtub faucet hardware.
Slip-on spouts are incredibly common in modern homes because they are simple to install and adjust.
Threaded spouts require a bit of precision to ensure they align perfectly straight when fully tightened.
Yes, you should always turn off the water before working on your tub spout. While the shower valve controls the main flow, working on a system under pressure is risky. If the valve cartridge is worn or accidentally bumped, water can spray out at full pressure, causing immediate water damage to your bathroom. Turning off the main water supply and draining the lines is a quick step that ensures absolute safety.
If water is constantly dripping out of your spout even when the handles are turned completely off, the issue is not actually the spout itself. The culprit is the shower valve cartridge or worn-out rubber washers located behind the wall handle.
To fix this, you will need to:
Keeping your pipes clear of mineral buildup can also extend the lifespan of these cartridges. If you ever run into drainage issues while working on your tub, check out our helpful guides on Drain Cleaning to keep everything flowing smoothly.
While installing new bathtub faucet spouts is a highly manageable DIY task, some situations require professional expertise. You should call a licensed plumber if:
Upgrading your bathroom with a sleek, modern fixture is a rewarding project that elevates your home’s aesthetic and keeps water bills low. By following this guide, you can successfully navigate installing new bathtub faucet spouts on your own.
However, if you run into a stubborn, rusted pipe, a hidden leak behind the wall, or simply prefer the peace of mind that comes with professional installation, we are here to help. At Upfront Plumbing Drains Heating & Air, we provide honest, upfront pricing, exceptional quality work, and unmatched warranties across the Treasure Valley, including Boise, Meridian, Nampa, Caldwell, Eagle, and Garden City.
Ready to get those stubborn plumbing issues sorted out once and for all? Contact the local Idaho experts at Upfront Services today to schedule your service!
Our licensed team is available 24/7 across the Treasure Valley.

Reach out for fast, upfront service on any plumbing, drain, or HVAC issue — no obligation.
Get a No-Obligation Quote